Preparing your space for the holidays doesn’t have to be stressful, time-consuming or require a ton of store-bought and expensive embellishment. Twinkling lights and sparkly baubles you’ve collected over the years look fabulous paired with foraged finds from your own garden or a nearby park.
A little creativity and DIY know-how can go a long way. Sheila Centner, co-owner with husband Sebastien of Toronto-based caterer and event planning company Eatertainment, likes to elevate her approach by picking a theme (be it pared-down Scandi design or full-on sparkles and bling) and carrying it from outdoors to indoors. “Whether it’s by colour or style, your decorations should tell a single story,” she says.
Ultimately, it’s about whatever says warm and cozy to you. Here are 10 tips from design pros on how to add holiday style to your home – with less cost and fuss.
Save time and money with these host-friendly holiday recipes and tips
Ten ways to save up to $1,000 this holiday season
How to save on the holiday urn
The DIY Mommy/handout
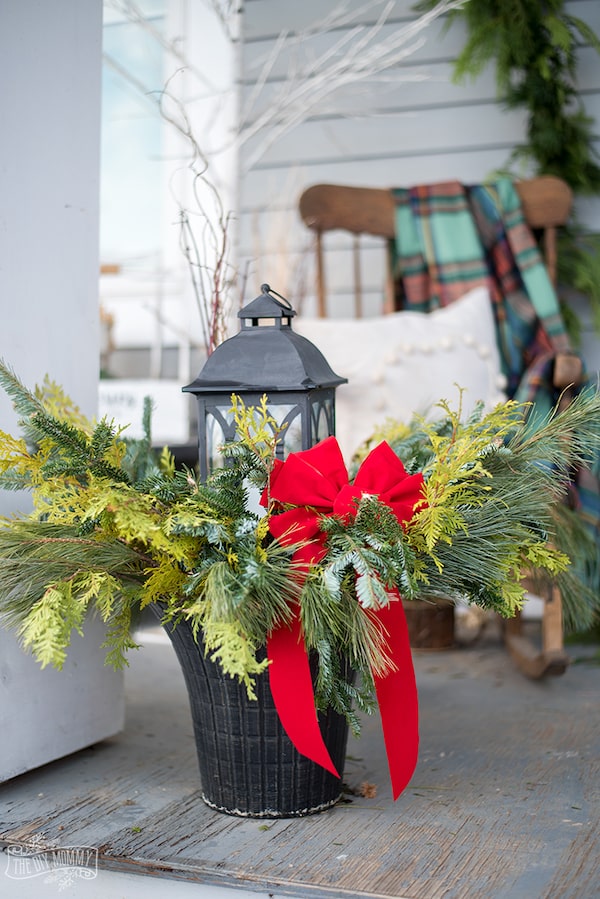
The most inexpensive outdoor urns are the ones you make yourself, with either foraged materials (spruce, cedar, juniper, magnolia or boxwood) or packages of greens from any garden centre.
Edmonton’s Christina Dennis, a.k.a. the DIY Mommy on YouTube, saves the mum pots in the fall and uses them (and the soil) as a base for fresh Christmas greenery that she gathers from her yard. She snips the stems of greenery before popping them into the dirt, and then adds berries, pine cones, dogwood and sparkle branches for a splash of colour.
However, if doing your own seems too time-consuming and/or daunting, Kate Seaver, owner of Kate’s Gardens in Markham, Ont., recommends buying pregreened pots (which at her store, start at $55 for a 30-inch pot) and then embellish them with decorations you’ve saved over the years, everything from faux poinsettias and fruit, to different sized-Christmas balls zip-tied together (in odd numbers, say threes and fives) to create popcorn-inspired clusters.
Make an affordable wreath
The DIY Mommy/handout
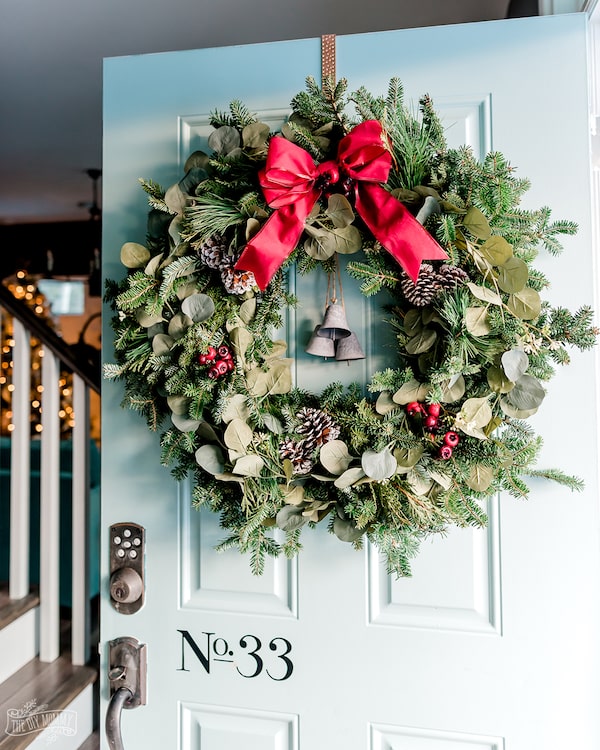
Begin with an old wreath that is begging to be repurposed or buy a new, inexpensive real wreath. Dennis makes a colourful bow out of wire-rimmed ribbon, which she ties to the top of the wreath. Then she takes a faux eucalyptus garland she purchased years ago at Ikea, and wraps it around the wreath a couple of times, tucking it in. This year, she added a Christmas ornament of tiny brass bells (attached with fine wire), which hangs down the centre of the wreath.
If your tastes are more woodland and rustic, Alison Westlake, owner of the floral decor company Coriander Girl in Prince Edward County, Ont., recommends starting with a basic grapevine or metal wreath. Using snippets of greenery she gathers from her property, she starts with a small cluster and then keeps overlapping those clusters around the wreath with fine wire. She finishes it off with pine cones and a pretty silk ribbon.
Even easier to make are Westlake’s door swags: Start with the largest bough on the bottom (cedar or spruce), wire on some eucalyptus and a simple silk ribbon at the top. Tuck in some berries and rose hip.
Decorating the doorway for less
Janet Kwan/Supplied
Etsy trend expert Dayna Isom Johnson believes the entryway is “your opportunity to set the stage for what’s happening inside.” She makes it count by filling a large glass vase with boughs she cut off the bottom of her tree so that guests are greeted by the fresh smell of pine, cedar or Douglas Fir.
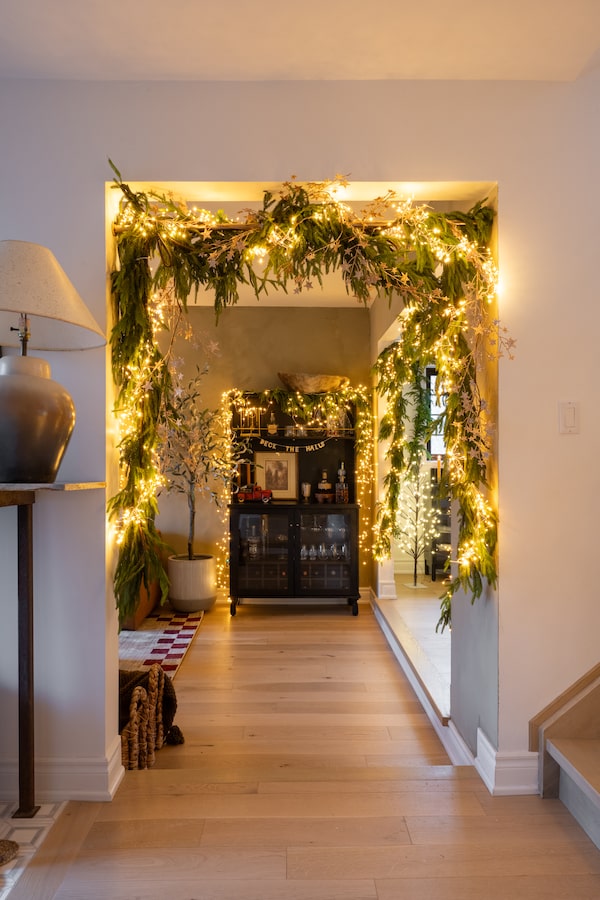
Wendy Lau, @kwendyhome on Instagram, has tapped into a decorating trend that has taken TikTok by storm. Perfect for an entryway (and for renters who don’t want to put nails in their walls), take an adjustable curtain rod and fit it in your doorway at a height that is easy to work with. Wind a faux or real garland (you may need two to create a fuller look) and then add embellishments that compliment the rest of holiday decor. (Remember, stick to a design narrative). Fluff the garland (if it’s fake, a hair dryer will help make the branches more malleable). Weave in battery-operated twinkle lights, a garland of glittery stars and some twine. Raise it to the desired height. Guests will be wowed.
A wallet-friendly way to dress the mantle
Janet Kwan/Supplied
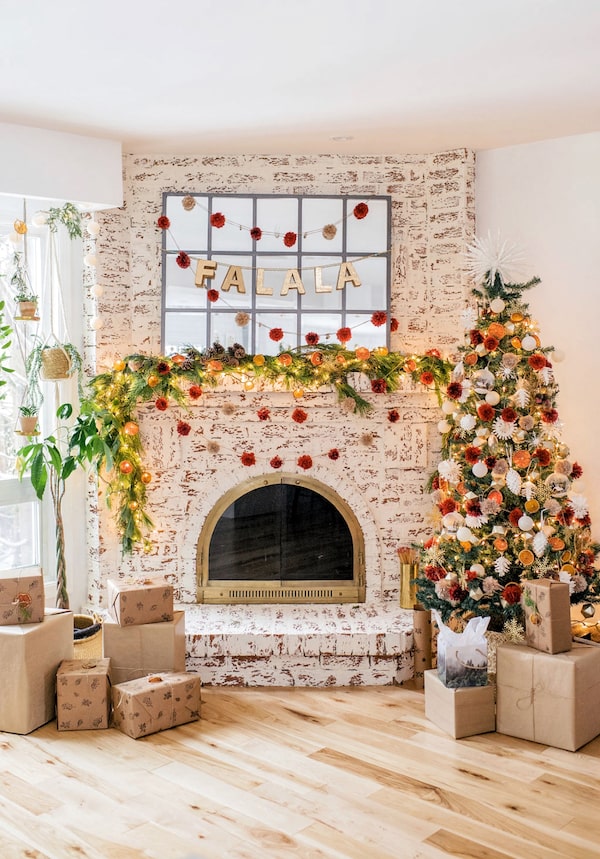
Etsy’s Johnson does not have a fireplace mantle so she “mantlescapes” on a table under her TV. She starts with a base of green (she goes to a tree farm or nursery and asks for extra greenery, which she lays end to end but faux garlands work just as well).
She then chooses objects to anchor each end (stacks of Christmas books, vintage nutcrackers, holiday lanterns or pillar candles), and fills in the middle with Christmas ornaments (popcorn clusters of ornaments, in hues similar to ones used in a wreath or urn, help carry on the design theme) little wooden Christmas trees, some holly sprigs and fairy lights. The final effect is nostalgic and merry.
Lau, on the other hand, goes for an equally cost-effective but bolder look for her fireplace mantle, mixing spruce greens with giant snowflakes made from paper bags.
Your tree, starting from the bottom
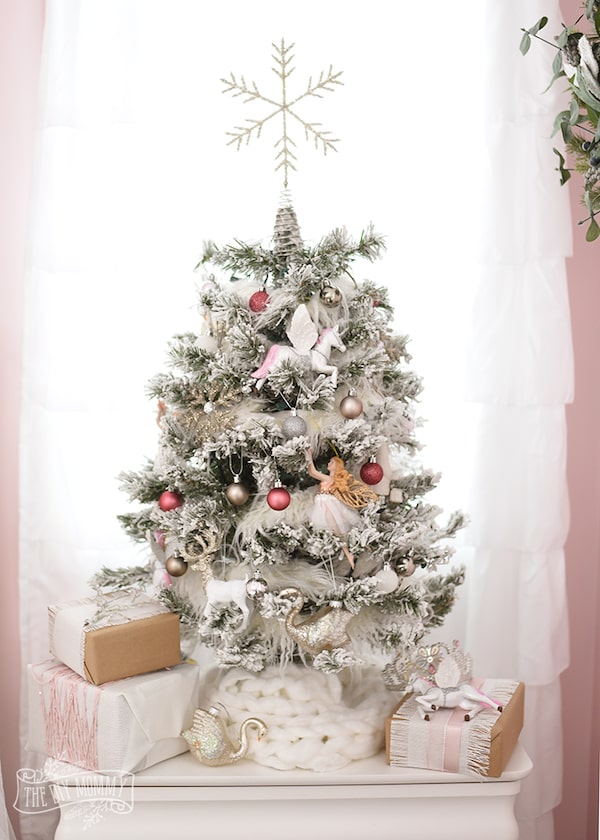
The DIY Mommy/Supplied
Coriander Girl’s Westlake likes to put her fresh tree in an antique tin bucket to strike a cottage-in-the-country look. (The tree is placed in a secure tree stand first so that it can be watered regularly).
Another option would be a large wicker or woven basket.
If your home is more formal, a decorative planter looks elegant and refined, while those seeking a cozy cabin vibe might wrap the tree stem in a chunky knit blanket or a sheep skin rug.
And there’s no rule that you must use a real tree: Sebastien Centner of Eatertainment switched from a real to faux because “it feels far more sustainable than cutting a tree down every year.”
Stay within budget with DIY tree decor

Supplied
Westlake is a tree purist and only decorates with “treasures” she finds in her garden, such as plumed grasses, dried hydrangea (which can be spray-painted to match your colour scheme), dogwood branches and garlands she makes out of dried oranges strung on twine.
Orange garlands are simple to make: Preheat oven to 175F; slice orange ¼-inch thick and sprinkle with confectioner’s sugar (which keeps it from browning); place on parchment paper on a baking sheet and bake for two-plus hours, flipping them periodically to ensure they dry on both sides.
Leanne Dowdall of Cambridge, Ont.-based Crafty Creatures strings together different sized lights, some retro and oversized (like our parents used to have), along with minilights, so you can mix what you have on hand and what’s on sale.
And finally, for a one-of-a-kind tree decoration, Hasmig Royan, of Green Garden Interiors in Burlington, Ont., uses a three- or six-inch open-sided glass globe (available in packages of four on Amazon), puts in some dirt, adds a succulent plant (the echeveria variety look like tiny roses), some moss and a few tiny baubles. Care is simple. Give it three tablespoons of water once a month with a spoon or turkey baster.
Dress up candles with odds and ends
Unsplash/iStockPhoto / Getty Images
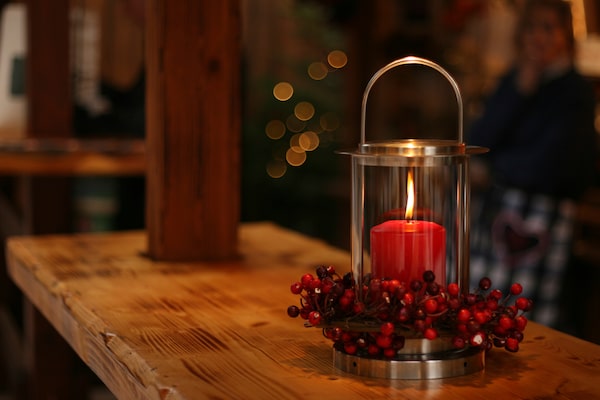
The DIY Mommy, a.k.a. Dennis, elevates a common white pillar candle by laying sprigs of pine or cedar (scraps from your tree work well), vertically, along the sides. Wrap an elastic band around the sprigs to keep them in place. Snip any stray leaves away from the top of the candle to ensure they are far from the flame. Cover the elastic with ribbon or twine.
Etsy’s Johnson loves to decorate with taper candles, everything from the classic, to woven, braided or hand-painted. She takes different sized glass bottles and fills them with greenery, cranberries and some water. Then she adds the candle and spreads those in odd-numbered groups along the length of her dining table. (Note: Replace the water every few days to keep the greens looking fresh.)
Simplify your tablescaping
Unsplash/stock
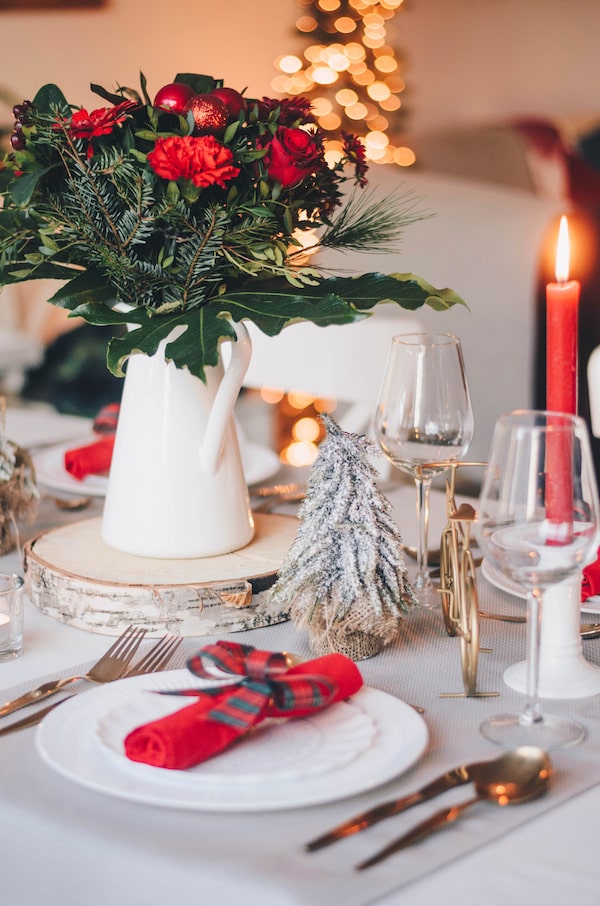
Peter Paquette, owner of Toronto interior design company 1982 Design, suggests keeping things simple and natural. He fills a large vase with natural greenery like long-needle pines, his favourite, which he might embellish with a few lily-white stems of cut amaryllis.
Or, lay a runner down the length of the table and place freshly cut sprigs of green down the length of it, with some pine cones and taper candles (in a mix of modern and vintage candle sticks) interspersed throughout.
Sometimes, instead of using taper candles, Paquette will place a single votive at each place setting with a handwritten place card. A crisp napkin, with a sprig of pine or fresh holly, finishes the look.
Save money on gift-wrapping
The DIY Mommy/Supplied
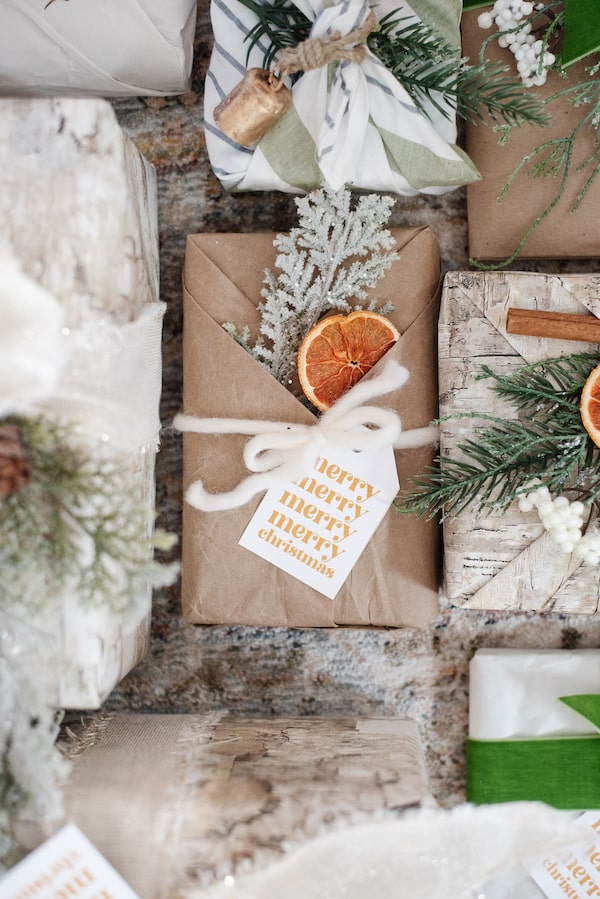
Making packages pretty need not involve a lot of materials, which, after the holidays, go directly into landfills. Westlake tries to repurpose what she already has on hand – fabric scraps for smaller presents (they can travel without worry of paper ripping or bows bending) or she uses kraft paper (it’s biodegradable and available at any craft supply store) and embellishes her presents with dried fruit, a sprig of holly or cedar, small pine cones or dried flowers, which she attaches with simple twine.
Trade pricey candles for scented simmer pots

Unsplash/iStockPhoto / Getty Images
Simmer pots – also known as stovetop potpourri – will make your whole home smell like the holidays within minutes. Dennis shares this simple recipe: Take two cups of water and bring it to a boil, lower the heat to simmer and add one sliced orange (apples work, too), a teaspoon of cloves, two or three cinnamon sticks, a couple of spruce twigs and some vanilla bean pieces. Often, she takes the same ingredients (except she uses dried orange slices) and puts them into small Mason jar, tied with a ribbon, as holiday hostess gifts.